Thursday, November 8, 2007
Running a Batch
So, Tresure asked me about this and I thought you all might want to know as well. She asked how to run an "action" on a folder of pictures. All you do is go to File> Automat> Batch. And then you will see where you select the folder and the action. You can also just run your action on one picture by opening it up and just pushing "play" underneath the "action" folder. Let me know if you have questions.
Photography Class
So, I have been going to a photography class lately and it's been really fun. Here are a few tips that I really liked:
1. Fall pictures - this is a little late but hopefully you can still find some fall leaves. If you get a Polarized lens cover, it dims the brighter areas leaving you with more saturation. You will get the most out of the beautiful colors. However, since you are toning down the lighter areas, you'll want to take this lens off when you are taking pictures in dimmer light. Otherwise, you would have to bump up your ISO's and risk creating more noise in your picture.
2. Reflecting light - I'm sure you have all figured out the trick to taking pictures inside with your "Direct On Camera Flash" (aka the flash that you have to physically attatch to your camera). In case you haven't, to get the most out of your in door pictures, point your flash towards the ceiling above you (hopefully it is white or some kind of tone around that) and bounce it off towards your subject. I've been doing this for a while now, thanks to my fabulous teachers Jen and Becky but I learned last night that you can tape or attatch some other way, a white card to the back of your flash so that it sticks up a couple of inches from the flash. What happens is when you take the picture and the flash goes off, the light not only bounces off the ceiling but also off the white card, creating light that hits your subject from the top and the front. This will smooth hard lines and edges. Let me know if I need to post a picture of what I'm talking about.
3. Also, along the lines of lighting, you can take a white sheet and hold it up in fron of a lamp to create soft lighting for portraits and etc. You really can create your own photo studio with objects like these, it's all about diffusing your light and spreading it out.
4. www.strobist.com - my professor told us of this website where they take cool pictures using regular camera flashes. Just something fun to look at.
Friday, October 19, 2007
Just another shoot


These guys are all cousins. Aren't they such a good lookin' family?
Also, another thing I've learned - don't wear white to a photoshoot. It washes everything out. I didn't have a chance to tell them not to wear white and they were avid about doing it because they were remaking a photo they took when all the kids were littler. In the old photo they all wore white too, so they had to dress the same.
Wednesday, October 3, 2007

Thanks to my friend Allie, I learned how to do brighter eyes and it was sooooo fun. I also added burnt edges (also "thanks" to Allie for that tip). Here is my before and after. Oh, and the link for the tips she gave. She is REALLY knowledgeable about Photoshop and an awesome photographer.
http://1000wordsphotography.typepad.com/allie/2007/01/post.html
Tuesday, September 18, 2007
Burnt Edges continued

Okay, here is a burnt edge picture trying it the way my friend Allie suggested. I like this look alot better, not so organized. Try it out everyone and let us know how you like it.
Monday, September 10, 2007
Burnt Edges Look
Okay, thanks to Lexi (Thank-you Lexi!) I finally know how to do the burnt edges look. I tried what you told me and you were right, it turned out great! I then remembered that Becky had e-mailed me months ago how to do it and searched my e-mail for the directions. Here they are:
1. Use the Rectangular Marquee Tool to make a selection an inch and a half in from the edge of the entire photo.
2. Go to ‘Select’ then ‘Feather’ (I typically make the selection about 40+ pixels)
3. Go to ‘Select’ then ‘Inverse’
4. Go to ‘Image’ then ‘Adjustments’ then ‘Levels’
5. Pull the middle slider (it’s gray) to the right a tiny bit
2. Go to ‘Select’ then ‘Feather’ (I typically make the selection about 40+ pixels)
3. Go to ‘Select’ then ‘Inverse’
4. Go to ‘Image’ then ‘Adjustments’ then ‘Levels’
5. Pull the middle slider (it’s gray) to the right a tiny bit
Hope you don't mind me sharing this Becky (which I'm sure you're thinking I'm a Barney for even asking). I chose to use the oval marquee for this picture because it just fit better. Although, I should have moved it down a little bit more but you get the jist. Below is my experiment with it: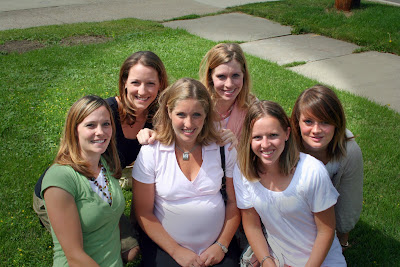

Subscribe to:
Posts (Atom)