Many of you have asked me lately about how when you print a picture off at Costco, it's darker than what is on your screen. I'm going to give you a brief explanation of how to download a profile thus calibrating your monitor with Costco's and hopefully giving you the picture you want.
What you need to do is go to costco.com and click on "photos" at the top. Once you have signed in, you will see an option for "printer profiles" somewhere in the middle of the page in blue lettering. Click on it. Then, under "option 1" click "continue" (or just go to this link: http://www.drycreekphoto.com/icc/). On the left hand side, find your state and then find your city in the middle column. For example, I clicked on "ohio" on the left hand side and scrolled down until I saw "Cleveland:".
I know not all the Costco's offer the same options so you may have to kind of figure it out for yourself from here if it's not the same as mine. But, under "Cleveland:" there is an option for "Glossy paper profile, October 1, 2007" and "Lustre paper profile, October 1, 2007". You then need to click on one of these options (depending on whether you do glossy or lustre) and save it in the following extension: \Windows\system32\spool\drivers\color. If that doesn't make sense, what you do is go to your C: drive > Windows >system32 > and so on. I can't promise that all of your computers will be in those exact locations either (or go here:http://www.drycreekphoto.com/Learn/profile_install.htm to see other options). You can see how to use your profiles and apply them to your pictures by going here: http://www.drycreekphoto.com/Learn/profiles.htm
That's a whole lot of information but I hope it helps.
Sunday, November 11, 2007
Friday, November 9, 2007
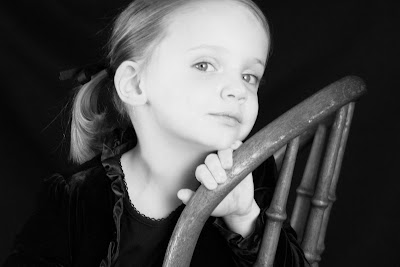
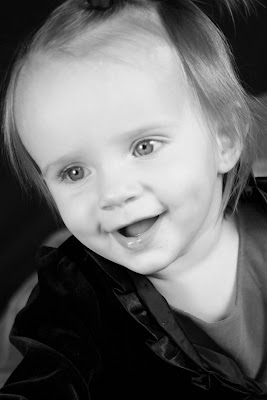
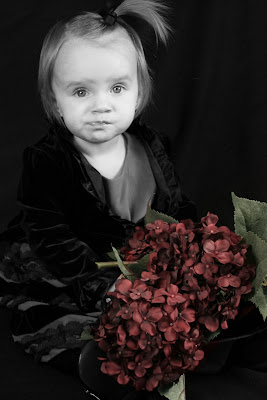

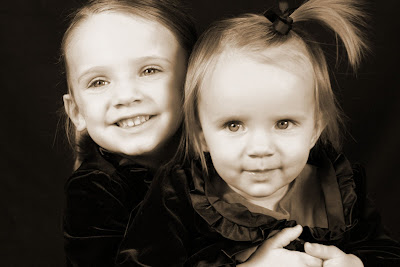
I can't remember who, but someone asked how to do the black and white photos with a little color (like the 3rd pic down). I don't know if I ever answered but the way I do it is create a second layer (command J or control J) then desaturate it. Then I take my handy dandy eraser, put the opacity at say... 65% or something, and then erase over the part that I want color to show through. You just make your eraser smaller or bigger to help you get the job done adequately. There are many other ways to do it, but that's the way I prefer.
Another thing I wanted to say about these photos is that the only editing I did to them (besides desaturation and sepia) is cropping - that's it. I was so pleased with the lighting from my Smith Victor lights that I didn't have to do ANY editing. PLUS, I took them in MANUAL mode. I know, I know, FINALLY!!! I get it. I finally get it and I feel so free! Okay, I better stop before I break into song.
Thursday, November 8, 2007
Running a Batch
So, Tresure asked me about this and I thought you all might want to know as well. She asked how to run an "action" on a folder of pictures. All you do is go to File> Automat> Batch. And then you will see where you select the folder and the action. You can also just run your action on one picture by opening it up and just pushing "play" underneath the "action" folder. Let me know if you have questions.
Photography Class
So, I have been going to a photography class lately and it's been really fun. Here are a few tips that I really liked:
1. Fall pictures - this is a little late but hopefully you can still find some fall leaves. If you get a Polarized lens cover, it dims the brighter areas leaving you with more saturation. You will get the most out of the beautiful colors. However, since you are toning down the lighter areas, you'll want to take this lens off when you are taking pictures in dimmer light. Otherwise, you would have to bump up your ISO's and risk creating more noise in your picture.
2. Reflecting light - I'm sure you have all figured out the trick to taking pictures inside with your "Direct On Camera Flash" (aka the flash that you have to physically attatch to your camera). In case you haven't, to get the most out of your in door pictures, point your flash towards the ceiling above you (hopefully it is white or some kind of tone around that) and bounce it off towards your subject. I've been doing this for a while now, thanks to my fabulous teachers Jen and Becky but I learned last night that you can tape or attatch some other way, a white card to the back of your flash so that it sticks up a couple of inches from the flash. What happens is when you take the picture and the flash goes off, the light not only bounces off the ceiling but also off the white card, creating light that hits your subject from the top and the front. This will smooth hard lines and edges. Let me know if I need to post a picture of what I'm talking about.
3. Also, along the lines of lighting, you can take a white sheet and hold it up in fron of a lamp to create soft lighting for portraits and etc. You really can create your own photo studio with objects like these, it's all about diffusing your light and spreading it out.
4. www.strobist.com - my professor told us of this website where they take cool pictures using regular camera flashes. Just something fun to look at.
Friday, October 19, 2007
Just another shoot

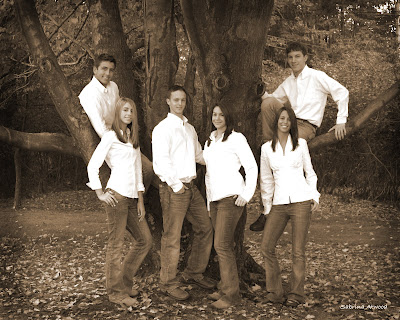
These guys are all cousins. Aren't they such a good lookin' family?
Also, another thing I've learned - don't wear white to a photoshoot. It washes everything out. I didn't have a chance to tell them not to wear white and they were avid about doing it because they were remaking a photo they took when all the kids were littler. In the old photo they all wore white too, so they had to dress the same.
Wednesday, October 3, 2007

Thanks to my friend Allie, I learned how to do brighter eyes and it was sooooo fun. I also added burnt edges (also "thanks" to Allie for that tip). Here is my before and after. Oh, and the link for the tips she gave. She is REALLY knowledgeable about Photoshop and an awesome photographer.
http://1000wordsphotography.typepad.com/allie/2007/01/post.html
Tuesday, September 18, 2007
Burnt Edges continued
Monday, September 10, 2007
Burnt Edges Look
Okay, thanks to Lexi (Thank-you Lexi!) I finally know how to do the burnt edges look. I tried what you told me and you were right, it turned out great! I then remembered that Becky had e-mailed me months ago how to do it and searched my e-mail for the directions. Here they are:
1. Use the Rectangular Marquee Tool to make a selection an inch and a half in from the edge of the entire photo.
2. Go to ‘Select’ then ‘Feather’ (I typically make the selection about 40+ pixels)
3. Go to ‘Select’ then ‘Inverse’
4. Go to ‘Image’ then ‘Adjustments’ then ‘Levels’
5. Pull the middle slider (it’s gray) to the right a tiny bit
2. Go to ‘Select’ then ‘Feather’ (I typically make the selection about 40+ pixels)
3. Go to ‘Select’ then ‘Inverse’
4. Go to ‘Image’ then ‘Adjustments’ then ‘Levels’
5. Pull the middle slider (it’s gray) to the right a tiny bit
Hope you don't mind me sharing this Becky (which I'm sure you're thinking I'm a Barney for even asking). I chose to use the oval marquee for this picture because it just fit better. Although, I should have moved it down a little bit more but you get the jist. Below is my experiment with it: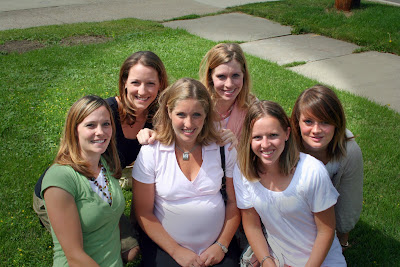

Saturday, September 8, 2007
Tuesday, August 28, 2007
Not Dead
Sorry guys! I haven't posted anything lately (obviously). Things are a little crazy and busy right now. But, if there is a tip you learned and would like to share with the rest of us, please e-mail me at sabrinaatwood@gmail.com. I will then set you up to be an author on this blog so you can put in some tips too. Also, I would love to see some scrapbook layouts. I think that falls in the category of "phototipster" (that's what most of us are taking these pictures for anyway right?). Plus, I need some motivation right now. MOTIVATE ME!!!
Wednesday, August 8, 2007
Lighting
Lately, I have really enjoyed using my lighting. That's right, I said it, I got some indoor lighting. I just don't have any good big windows to shoot pictures in my house so I'm always spending countless hours on Photoshop adjusting the lighting on ALL my pictures.
I was walking in the mall and walked past Ritz Camera. In the window, they had a display of 3 lights with 2 umbrellas. You just plug them in and leave them on. So you don't have to time them with your camera or anything and the umbrella's make the light softer. I really like them. They are from Smith Victor and I can't remember if it was $150 or $200 for the set of 3 with the umbrella's.
It has been so great to have them. If I do want to touch up the pictures, I can run a "batch" on photoshop and retouch them all at once because they all have the exact same lighting. I highly recommend them. You can also get a soft box later on or something of that nature if you want to go bigger.
Wednesday, July 18, 2007
Saturday, July 14, 2007
Creating an Action
I have LOVED the "Actions" tab ever since I figured out how to use it. I use the Actions folder alot when I do photoshoots. What it does is records everything you do to ONE picture so that you can run a "batch" that will do all the same things to a FOLDER of pictures. For instance, I did a photoshoot in my house with my new lighting (yup, got some lighting) that still needed the colors tweaked with the "Auto Levels" option (I was still figuring out the settings on my camera). So, I plopped one picture onto my Photoshop program and pressed the "Create a new action" button (The little picture that looks like a paper is being turned. It's in the bottom right hand corner of the "Actions" folder, next to the little garbage can.) and named my action "Auto Levels". Then I pushed "record". You will notice that a little circle, a few buttons over from the "create a new action" button, turned red. That means Photoshop is recording everything you do to that picture.
So, I selected "Auto Levels" then saved my work. I then pushed the "stop playing/recording" square button to the left of the "record" button. Now the actions that I did to that picture are saved. I can run a "batch" and do that action to every picture in a folder with one click instead of opening everything picture one at a time AND doing Auto Levels AND then saving it. You just sit back and watch it work. Love it!
So, I selected "Auto Levels" then saved my work. I then pushed the "stop playing/recording" square button to the left of the "record" button. Now the actions that I did to that picture are saved. I can run a "batch" and do that action to every picture in a folder with one click instead of opening everything picture one at a time AND doing Auto Levels AND then saving it. You just sit back and watch it work. Love it!
Welcome, welcome
Welcome to the new blog for your Photoshop and all around photo needs! I started this blog in hopes that we can all share the new tips we've learned and learn from the tips of others making us all official "Photo Tipsters"! So, if there is a new trick you've learned on Photoshop or with taking photos, post it. If you are wondering how to do something, ask it. We've been sharing tips between each other for a couple of years now so let's make it a little easier to share.
Post away Tipsters!
Post away Tipsters!
Subscribe to:
Comments (Atom)

